Showing posts with label macrobiotic. Show all posts

Wednesday, May 18, 2011

Soup Spoons

I've been washing a lot of spoons lately.  That's probably because I've been making a lot of soup lately.  It must be the weather.


Since my last soup entry (Zucchini-Asparagus Soup with Basil), I've made several more.  The first was Spring Onion Soup, mostly because I'd gotten almost a dozen of these in my weekly box:


It's hard to make green soup look appetizing!  In fact, I'm wondering now if this was actually supposed to be made with only the bulbs of the red spring onions... Either way this was surprisingly delightful.  I was sure that anything prepared with that many onions, and not a lot of other ingredients, was bound to overwhelm even my taste buds!  Why I imagined it would taste like biting into a raw onion, I don't know.  Instead I found the taste of the onions to be subtle and almost sweet, even creamy.  

The next night I made a Curried Lentil Soup that seemed to get better with each reheating.  


The same could be said of this Lentil Barley Soup...


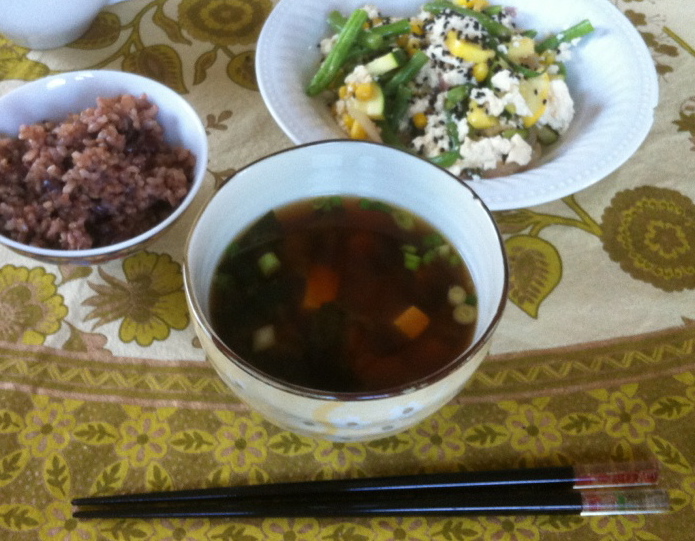
We had leftovers today and the flavors had fused together perfectly.  Pictures with no recipes...am I evil or what??  Here's one, with more to follow very soon (I promise!).

Lentil Barley Soup
Serves 8

2 Tbs olive oil
2 carrots, peeled and diced
1 onion, diced
1 medium parsnip, peeled and diced
3 garlic cloves, minced
3 tsp cumin
10 cups vegetable broth
3/4 cup barley
1 (14 oz.) can diced tomatoes, no salt added
3/4 cup lentils
1 bunch kale, cute into 1" thick strips
chopped fresh dill, for garnish

Heat oil over medium heat in a large soup pot and add carrots, onion, parsnip and garlic.  Cook, stirring frequently, for about 7 minutes.  Add cumin and cook 1 minute.  Then add vegetable broth and barley and bring to a boil.  Reduce to simmer and cook, partially covered for 25 minutes.  Stir in tomatoes with their juices and lentils.  Continue to simmer another 30 minutes, or until barley and lentils are tender.  Add kale and simmer 10 minutes.  Garnish with dill and serve.

*If you're eating macro and avoiding tomatoes, they can easily be left out of the recipe, but you'll need to add another cup or so of vegetable broth so the soup doesn't get too thick.


Wednesday, March 30, 2011

Kimchi! ...dedicated to Susanne, for being so patient...

You open the fridge and you get a whiff... Mmm...fermented cabbage...

That's right.  You bought a jar of kimchi last month and now it's on the brink of turning sour.  All the other food in your fridge is starting to taste like kimchi too, so you have to use it up.  By now the cabbage is probably turning clear which means that it's the perfect time to make Kimchi Jjigae.  This is a delicious, spicy Korean stew that is typically made with pork belly, but of course the version I made is vegan.

My sister-in-law is Korean and her dad owns a restaurant in Orange County.  Recently, he sent down a big jar of his house-made kimchi with her for The Boy and I.  Let me tell you, I have never tasted better kimchi than the stuff he whips up at his restaurant.  Holy Moly.  Anyway, I've been dying to make kimchi jjigae for months now, but I have to be honest.  I'm totally intimidated by Korean cooking!  It's completely different from anything I've ever done so I was sure I was going to completely screw it up.  So I texted my sister-in-law for her recipe, and I decided to use what she gave me mixed with a few other goodies, and this is what I came up with:


Vegan Kimchi Jjigae
Serves 4

sesame oil, 2 Tbsp, plus a little extra for garnish
4 cloves garlic, minced
1/2 an onion, sliced into half moons, about 1/2 inch thick
1 carrot, julienned
1/2 a small head of cabbage, chopped
2 1/2 cups kimchi, coarsely chopped
kimchi juices
1 tsp brown rice syrup (or more, to taste)
1 Tbsp soy sauce
1 Tbsp mirin or sake
1 package tofu, cubed
2 green onions, thinly sliced

Heat sesame oil in a soup pot over medium heat.  Add garlic and saute 1 minute.  Add onion and saute 3 to 4 minutes.  Add carrots, cabbage, kimchi and kimchi juices and stir to combine.  (If there's not a lot of kimchi juice in the jar, squeeze the kimchi to get more juices out.)  Add enough water to just cover kimchi mixture.  Bring to a boil and simmer, covered, for 30 minutes.  Add syrup, soy sauce, mirin and tofu and simmer 5 minutes longer.  Ladle soup into bowls, drizzle with a little sesame oil and top with green onions.  Serve piping hot with a side of rice.

Tip:  If you really like it spicy, add red chili flakes, red chili paste, jalapeƱo peppers or spicy green chilies.

Macro Eaters:  If you like to include fish in your diet every now and then, try adding a few chunks of mild, white fish to the broth for added flavor and texture.  You'll want to add it during the last 15 minutes of cooking so that it doesn't cook too long and turn to rubber.

Monday, March 14, 2011

I'm Gonna Knock the Bitter Out of Those Greens

Mustard greens were one of the items in my weekly produce box from last week.  So for an entire week, those greens have been sitting in the bottom drawer of my refrigerator as every night I would push them aside to reach other, less bitter and less intimidating vegetables.  Today, another bunch of mustard greens showed up in my box and I sighed, almost wishing that the other batch had gone bad by now so that I could throw it away.  Terrible, I know, but when I'd tried to add them to my morning miso or stir fry they left such a bitter aftertaste in my mouth!  So tonight I was bound and determined to knock the bitter out of those greens.  This is how I did it.  I thank my mom for the idea.

Japanese-Style Mustard Greens
Serves 2 to 3

1 large bunch mustard greens, stems trimmed and cut into bite-sized pieces
1 tsp toasted sesame oil
2 tsp soy sauce
1 tsp brown rice syrup
1 tsp mirin (a sweet sake for cooking - occasionally used in macro cooking)
1/4 block of medium-firm tofu, patted dry with paper towels
crushed sesame seeds for garnish

Bring a large pot of water to boil.  Add greens and cook for 2-3 minutes.  Strain in a strainer and push out as much water from the greens as you can without burning your hands.  Set aside to cool for a few minutes.  Once greens have cooled, squeeze out any excess water from greens and set aside.  In a medium pan, heat sesame oil over medium heat.  Once oil is fragrant, using your fingers, separate greens as you add them to the pan.  Cook, stirring gently for about 1 minute.  Add soy sauce, syrup, and mirin to greens; stir gently until combined.  Crumble tofu with your fingers as you add it to the mustard greens.  Toss with greens and cook on low for another minute to warm tofu.  Sprinkle with sesame seeds and serve with brown rice, sauteed cabbage and adzuki beans with squash.  Oishii!

This is so good, I wish I'd made a double batch..


Wednesday, March 9, 2011

Back to Macro and Feeling Good

I admit it.  I've been a bit off track with my eating lately.  Yes, there has been a lot of eating out...there have been some sweets...even...coffee (gasp).  I know, I know!  So for the last three days I've been focusing mostly on macro again, and it feels so good!  My cheeks are rosy, my energy is up, and I'm just feeling more balanced overall.  Here's a sample menu, to give you an idea of how I kept my meals mostly macro:

Monday:

  • Breakfast - Oatmeal with a small teaspoon of maple syrup
  • Lunch - half a sweet potato (I had a late breakfast that day...I made up for it with dinner though)
  • Dinner - brown rice, arame with carrots & onions, sauteed shredded cabbage drizzled with flax seed oil, ume vinegar and gomashio, and seasoned mixed beets (recipe below)
Tuesday:
Wednesday:
  • Breakfast - miso soup with bok choy and dark greens, leftover rice pilaf (added some sauteed cabbage to freshen it up), natto and toasted nori
  • Lunch - stir-fried soba noodles with veggies
  • Dinner - I'm planning veggie soup with a side of whole grain bread
I was so tempted to make coffee this morning, but instead I brewed some kukicha tea and tried to forget about the taste of rich, creamy espresso...(single teardrop)...

After finishing dinner on Monday, The Boy told me he was so glad to have me as his wife because I cook healthy meals that he likes, and needs, to eat.  Awwwww :)

Seasoned Mixed Beets:
Serves 4 as a small side dish

12 small golden and chioggia beets, peeled and quartered
1 Tbs brown rice syrup
4 Tbs apple cider vinegar

In a large pot with a lid, steam beets in 1/2 cup of water until tender, about 20 minutes.  Strain and toss gently with brown rice syrup and vinegar.  Serve warm or chilled.


Sunday, February 6, 2011

Crispy Peanut Butter Treats with Chocolate Chips

This is my new favorite dessert because it's super easy to make and it totally hits the spot.  They're like rice crispy treats.  It comes from The Kind Diet cookbook.  It's vegan, and it's also considered macro if you leave out the chocolate chips (although I do have some issues with eating something with this much sweetener in it, even though it is the good kind of sweetener).  If you're trying to go macro, I suggest eating it only once or twice a week.

Before I get on with the recipe, I just want to add my 2 cents about grain-sweetened chocolate chips.  As I mentioned in one of my earlier posts, I don't usually like things that try to disguise themselves as other things.  If I want to eat chocolate, I'm going to eat chocolate.  But then I tried grain-sweetened vegan chocolate chips.  You can usually find Sunspire brand at natural food stores, and Jimbo's sells them in bulk.  They are usually sweetened with barley and corn, but you honestly don't taste any weirdness when you eat them.  I try, for the most part, to avoid sugar because I would rather not have headaches, puffiness and lethargy.  But that's just me.  So next time you go shopping for chocolate chips, give these little morsels a shot!

I'll get into other sweeteners, like brown rice syrup, next time.  For now, you're just going to have to trust me...Everyone I make these for loves them.  Even my sister-in-law, who swears she hates peanut butter.

Crispy Peanut Butter Treats with Chocolate Chips


Makes 9 to 12 squares


1 box brown rice crisps cereal (I usually find the Erewhon brand at Henry's)
1 3/4 cups brown rice syrup
Fine sea salt
3/4 cup peanut butter or almond butter (preferably unsweetened and unsalted)
1/2 cup grain-sweetened, non-dairy chocolate chips

Pour the rice cereal into a large bowl.  Heat the syrup with a pinch of salt in a saucepan over low heat.  When the rice syrup liquefies, add the peanut butter and stir until well combined.  Pour over the rice cereal.  Mix well with a wooden spoon.

Once thoroughly mixed and cooled to room temperature, stir in the chocolate chips.  Make sure the mixture is cool, or you will end up with melted chocolate instead of chocolate chips in your treats.

Turn the mixture out into an 8"x8" or 9"x13" baking dish.  Wet your wooden spoon lightly and press the mixture evenly into the pan.  Let cool for 1 hour in the fridge.  I like to scoop out a bowl-full for snacking on while waiting for the rest to cool.  It's so good when it's still warm!

Saturday, February 5, 2011

Getting To Know MISO

This one's for all you miso soup lovers.  

What is miso?
Miso is made from a bean (usually soy but not necessarily), sometimes a grain, salt, and a special bacteria called koji.  Because it's fermented and unpasteurized, miso is full of live enzymes that are great for digestion.  High in protein, vitamins (like E), minerals, and alkalizing to the blood, miso keeps the body balanced and happy, so it's fine to have miso every day if you'd like.  I do.  Sometimes I'll even have it once with breakfast and then again that night with dinner.  The minerals in miso also help support immune function because of it's zinc content.  I'm guessing all you sickies are wishing you've been eating a whole lot of miso soup lately...go make some right now!

Varieties ~
The different types of miso include:
  • hatcho miso (made from soybeans)
  • kome miso (made from white rice and soybeans)
  • mugi miso (made from barley and soybeans)
  • soba miso (made from buckwheat and soybeans)
  • genmai miso (made from brown rice and soybeans)
  • natto miso (made from ginger and soybeans)
Since there are so many varieties of miso out there, you might be wondering...

Which type of miso should I buy?
Be careful when buying miso from an asian market.  Most contain MSG, which is just not natural (and can cause headaches, nausea, heart palpitations...need I go on?).  Miso made with barley and aged at least 2 years is considered preferable to other misos in terms of its medicinal properties.  You can usually find barley miso at health food stores, or you can buy them online here or here.  If you try barley miso and you're not wild about it, try alternating with other misos that are more mild tasting.  Personally, I love barley miso.  It warms me from the inside out on the coldest days...

How do I make miso soup?
I thought you'd never ask!

Restaurant-Style Miso Soup

Serves 2

1 scallion, thinly sliced
2" piece wakame, cut into small pieces with scissors
1/4 of a block of soft or silken tofu, diced into small cubes
2 teaspoons barley miso

Bring 2 1/2 cups water to a boil in a medium pot.  Reduce heat, add scallions and wakame to pot, and simmer over low heat for 6-8 minutes.  Fill a ladle with some of the soup broth, dissolve miso in it, and then add it back to the soup.  Add tofu cubes and heat on low heat for 2 more minutes.  Serve immediately.

You can easily turn this into a hearty soup by adding all kinds of things - boy choy, dandelion greens, kale, cabbage, brown onions, carrots and other root vegetables - whatever your little "asian" heart desires!


Thursday, February 3, 2011

It has begun. Again.

I have so many things on my mind right now that I'm trying to make sense of.  But right now I only want to talk about something that always makes sense to me - FOOD.  The other stuff, I'm sure, will trickle out in weeks to come.

I feel like I have so many thoughts and ideas about food to share, though, that I don't even know where to begin.  Seriously.  I started making a list.  Some of you have been asking specifically for recipes.  To you I say:  I'm back and ready to start posting some vegan/macro goodness!  I've had a few months to read up more on eating a macro and vegan diet (the reason I'm mentioning both is because I'm doing kind of an 80%-20% thing right now...I'll explain in following posts), and I've been experimenting with recipes as well.  So they're coming, I promise.  And they are gooood.

Some of you have been asking how to use certain ingredients, for instance, the sea vegetables.  And some of you are just wanting to know what a day's menu would be like on the macro diet.  My plan (which may include mini detours along the way...) is to take one ingredient per post, explain it's benefits, and then share a recipe using that ingredient.

Anyway, just wanted to let you know that I'm back and that good things are coming!  For waiting so patiently...here's a recipe for some vegan Thumbprint Cookies I made recently.  I like that they're not sweetened with sugar, and yet are very delicious, and super cute!


P.S. For iPhone users, my new favorite App: Whole Foods Market Recipes or you can check their website.  That's where I found this recipe...


Thumbprint Cookies

Makes about 30 cookies

Ingredients

1 cup almonds or pecans 
1 cup rolled oats 
1 cup whole wheat pastry flour 
1/2 cup safflower or canola oil 
1/2 cup maple syrup or brown rice syrup 
1/4 teaspoon salt 
Fruit juice sweetened jam (St. Dalfour has a good one)

Method

Preheat oven to 350°F. Put almonds and oats into a food processor and pulse until coarsley ground. Transfer to a large bowl and add flour, oil, syrup and salt. Stir to combine well. Roll walnut-sized balls of the dough in the palm of your hand to form each cookie, then arrange on 2 large baking sheets, spacing cookies 2 inches apart. Press your thumb gently down into the center of each cookie to make an indentation. Spoon a scant teaspoon of jam into each indentation. 

Bake cookies until golden brown and just firm around the edges, 15 to 20 minutes. Transfer to a rack to let cool completely, then serve immediately or store between layers of waxed paper in an airtight container.

Nutrition

Per serving (2 cookies/46g-wt.): 210 calories (110 from fat), 13g total fat, 1g saturated fat, 0mg cholesterol, 40mg sodium, 21g total carbohydrate (3g dietary fiber, 9g sugar), 4g protein

Wednesday, December 8, 2010

Epiphany: My Life-Changing Decision to Go Macro

I've been inspired.  By Alicia Silverston.  Wait!  Before you start quoting lines from Clueless, let me explain.

Learning of my quest to enter into a vegetarian lifestyle, a friend of mine lent me the book The Kind Diet: A Simple Guide to Feeling Great, Losing Weight, and Saving the Planet, and that was it.  I am now a convert to the macrobiotic diet.  That's right, I've finally discovered what the theme of this blog should be!  After only 6 posts!  It's enlightening and liberating, to say the least.  I'm thrilled!

So why this book, you ask?

First of all, it made sense.  I actually get why some foods are bad for you and why.  All the other macro books out there were so hard to understand.  Then, once I felt like I was actually getting it, I would think, "Now what?  Tell me what I'm allowed to eat!  And make it sound delicious!"  Alicia did that for me.

Next, the recipes sounded doable, not to mention delicious!  In two days, I've already tried 2 recipes and loved them.  One was Alicia's Magical Healing Soup, and the other was:

Rice Waffle with Vegetable Melange


Quick and easy, these recipes both took about 30 minutes max to make.  Plus, they were both in the Superhero (macro) section of her cookbook.  Huh?  Superhero?  Yes, and that brings me to the next reason I love this book:

Based on your knowledge of the vegetarian, vegan and macrobiotic diet, you can decide where you want to start your journey to healthy eating, and then work your way up from there.  You can start out as a Flirt (low-pressure choice to give veganism a try and see where it takes you), a Vegan (no animal-based products at all), or a full-fledged Superhero (a macrobiotic superstar).  There are enough recipes in each category to keep you interested well beyond a few weeks.

If anyone else is interested, this is her website, and this is her book:
The Kind Diet: A Simple Guide to Feeling Great, Losing Weight, and Saving the PlanetClick here to save a few bucks at amazon.com
I'm buying one for myself and my mother-in-law today.  So, from here on out you'll find recipes and lifestyle tips on this blog that can hopefully help you enjoy eating a plant-based, and maybe even a macrobiotic, diet.  Another interesting thing is that, since macrobiotics has its roots in Japanese cooking, you'll still get to see a lot of Asian-influenced food here!

On a sad note, today was my last cup of coffee...... *sniff*  RIP Espresso Machine.

Tuesday, November 23, 2010

My version of Fried Rice


I wanted to use up the contents of my fridge today...

...wait, I'll go back a little further. In August of this year, 2010, my mother-in-law was diagnosed with a brain tumor. Since then, my in-laws have started on the Macrobiotic diet. To show my support, I became a vegetarian. Now, I know this is still miles from the macrobiotic diet, but I figured it couldn't hurt to give it a shot, and then maybe work my way into macrobiotics later. Anyway, I've been a vegetarian for about 2 months now (nothing to write home about, I know) and, surprisingly, I love it! I've tried it in the past, but I always caved because I craved meat. This time, not only do I not crave it, I feel incredible! My mind is clear, I have way more energy (something I shouldn't even have a problem with at 31), and I just feel happier in general.

So back to the fridge contents. Since becoming vegetarian, it's been so much easier to cook dinner. I just stuff my fridge with veggies and my pantry with beans, tomatoes, etc. and throw things together as I go. I've made soups, stews, stir-fries, and sautes, and I've enjoyed all of it. I'm not into fake meat products so none of my recipes will include the stuff, but feel free to add it as you see fit. My philosophy is: I will eat it as it was made to be eaten. If it's milk from a cow, drink milk from a cow. If you can't or don't want to, don't drink milk. If it's soy beans, then eat soybeans. Don't drink soy beans. Anyway, that's just me. I hate fake milk, although I'm trying to get used to almond milk in an attempt to fully convert to macrobiotics in the future (blah, it's just wrong!).

So back to my fridge contents. I pulled out zucchini, chinese eggplant, green onions, carrots, potatoes and leftover brown rice (all organic). I decided to ditch the potatoes and make:


Non-Traditional Veggie Fried Rice

4 Tbs vegetable oil, divided
1 egg, beaten
2 garlic cloves, minced
6 garden carrots (or 2 to 3 regular sized), sliced diagonally into 1/4" thick strips
2 zucchini, diced
2 chinese eggplant, diced
4 to 5 Cups cooked, refrigerated brown rice
4 Tbs soy sauce, divided
2 green onions, sliced thinly
fresh ground pepper, to taste

In a large saute pan over medium heat, add 1 Tbs. vegetable oil. Cook egg in oil until scrambled. Transfer egg to a plate. Turn heat to medium-high and add 1 Tbs. vegetable oil to pan, then add garlic and carrots and saute for 3 to 4 minutes. Add zucchini and eggplant and continue to saute for another 6 to 8 minutes, or until eggplant seems tender and zucchini is al dente. Transfer veggies to plate. Add remaining 2 Tbs vegetable oil, then add rice. Saute for 5 minutes. Then add 2 Tbs soy sauce and continue to stir gently, so as not to make the rice mushy. Return veggies and scrambled egg to rice pan, and stir to combine. Add remaining soy sauce, green onions, and a generous amount of pepper, and stir gently. This is more of a chunky fried rice, but I like it that way. It makes a good main dish.

Makes 4 to 5 main dish servings.

P.S. My future recipe posts will be much shorter...I think.